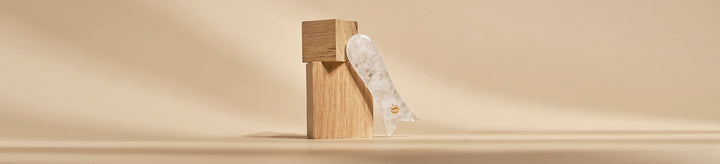
Calmlish Sculpt Gua Sha® is specially designed to tone, sculpt and tighten your face naturally. For example, around your cheekbones, chin and jaw, too make your face feel more toned, lifted and tight. Or under the eyes, to reduce any mild swelling or puffiness significant.
Benefits
- Face sculpting effect
- Glow boosting
- Tightens loose skin
- Lifting effect of the connective tissue
- Defines and tones the skin around cheekbones, brows and chin.
What is Gua Sha?
Today, Gua Sha (pronounced “gwa shaa”) is one of the most popular natural face sculpting techniques in Asia and it's becoming a real rockstar in the beauty industry worldwide.
Gua Sha is an ancient healing technique, originating from China but also used in Japan and Korea. It is an essential part of traditional Chinese medicine, used as folk medicine in many Chinese homes. It ́s origin dates back thousands of years and involves scraping the skin to eliminate toxins, waste products, tension and pain.
Gua means ”to scrape” and Sha means ”red spots / redness”. It is a highly effective treatment that provides immediate benefits. The tools used to scrape with, are special Gua Sha tools. In our facials, we have chosen to combine Gua Sha with crystal healing. Therefore, our Gua Sha tools are carved from genuine crystals collected all over the world. Each crystal is unique and our beauty tools will vary accordingly. Read more about the crystals here
WHAT IS NATURAL FACE SCULPTING?
Connective tissue massage is often referred to as face sculpting technique as it helps to lift, firm and contour your face through a combination of stretching the fascia tissue, muscle fibers and the skin and by opening up the lymph pathways to drain excess fluid build up.
When you massage your face, connective tissue massage techniques such as the gua sha massage below, blood flow to the skin increases, improving oxygenation and cell nourishment and build up of lymph fluid is removed. As a result the skin will look plumper, firmer, brighter, lifted and more sculpted as puffiness caused by fluid build up is removed.

GUIDE
It's important you use an oil appropriate for your skintype or a balm.
There are no rules for how often you need to use your Gua Sha. However for visible results, we recommend you start by doing Gua Sha 5 times a week. Once you have your desired results you can maintain them by doing Gua Sha 3 times a week or as needed.

1) The curve
Use this curve to hug each side of the eyebrow, each side of the cheekbone, and each side of the jawline to release build up tension and fluid and to tone the skin.
2) The small straight edge
With this edge you can drain away eye bags by gently placing the edge just below the eye at the inner corner of the eye and with feather-light pressure gliding the gua sha out to the outer corner of the eye. Imagine you are pulling a small water balloon under the skin.
This edge can also be used just below the eyebrow to lift and gently stretch the eyebrow muscle. You do this by placing the edge right beneath the eye brow and gently pushing up the eyebrow muscle to stretch it in an upwards motion.
3) The textured edge
The textured edge is used for increasing flow to the skin surface to promote a healthy glow as well as reduce fine lines and wrinkles.
4) The warped edge
We call this edge the lymphatic drainage edge, as the warped line creates a small vacuum when pulling it gently and with feather-light pressure against the skin. This helps drain away fluid retention. Here it is important that you keep the gua sha as flat as possible on the skin, so that the edge is constantly touching the skin and making sure your pressure is light and pace is slow. Imagine you are pulling a water balloon under the skin. The lymph pathways
5) The long edge
Use this edge for the classic gua sha scraping technique to stretch and lift the connective tissue and thereby the skin.
HOW TO USE THE LIFT GUA SHA
GET STARTED:
- Apply Calmlish Facebalm 01 on clean and damp skin.
- Grab your cleaned Calmlish Sculpt Gua Sha®
- During the facial. Hold the skin tight with the opposite hand to avoid pulling the skin back and forth
SCULPTING THE JAWLINE:
Place the textured edge (side 3) of the gua sha on the middle of your neck, under your chin, and the small straight edge of the gua sha touching your jawline. Now pull the gua sha with medium pressure and slow pace towards the lower part of the ear. Repeat 5-20 times.
Now turn around the Gua Sha and use the Sculpt edge (side 4) on the backside of the gua sha. Place the gua sha under the chin. Pull the gua sha along the jawline with a medium pressure and slow pace towards the lower part of the ear. Repeat 5-20 times.
Hug the jawline using the space between side 1 and 2 on the gua sha. Start by the center of the chin and pull the gua sha with medium pressure and slow pace towards the neck and lower part of the ear. Repeat this 5-20 times. When reaching the edge of the ear, make a little wiggle with the gua sha. This helps to remove tension and stagnation around the jawline, so blood flow and lymph flow is increased.
SCULPTING THE CHEEKBONES:
Start by using side 3 of the Calmlish Sculpt Gua Sha®.
Place the gua sha on the skin by the corner of the nose with a 45 degree angle.The textured edge (side 3) is touching the lower part of the cheek and cheekbone for drainage. The small straight edge (side 2) is pressing lightly under and up the cheekbone. This area might be sore as we carry a lot of tension here. Pull the gua sha 5-20 times over the skin, with medium pressure and slow pace, from the corner of the nose towards the ear. Do a little “wiggle” motion with the textured edge of the gua sha just before you reach the ear. This helps loosen up tension.
Now move the gua sha up over the cheekbone. Place the textured edge of the gua sha by the corner of the nose again, but this time pull it upwards and over the top of the cheek and cheekbone towards the top of the ear.
Pull the gua 5-20 times over the skin, with medium pressure and slow pace, from the corner of the nose by the nasolabial fold towards the upper part of the ear and do a little “wiggle” motion with the textured edge of the gua sha just before you reach the ear.
This stretches the fascia and muscle fibers to lift and tone the skin.
Now turn around the Gua Sha and use the Sculpt edge (side 4) on the backside of the gua sha. Use it the same way as earlier. Place the gua sha next to the mouth under the cheekbone. Pull the gua sha over the chin and cheekbone towards the hairline. Use a medium pressure and slow pace until you’ve worked through the entire area of the chin. Repeat 5-20 times.
SCULPTING THE EYE AREA
Place the Sculpt edge of the gua sha right under the eye by the corner of the eye. Make sure that the pressure you use here is feather-light. Too much pressure will block the lymph flow rather than drain excess fluid.
Now pull the gua sha gently and slowly towards the temple and hairline. Imagine you are pulling a water balloon under the skin. Repeat 5-20 times.
Now flip the gua sha using side 5 the long smooth edge. Place the tip of the edge (side 2) right under the eye by the corner of the eye and the other end of the edge by the corner of the mouth to drain the whole eye and cheek area. Use the same movements as before and pull over the skin with feather light pressure all the way towards the hair line. Repeat 5-20 times. The angle should be 15 degrees on the skin.
Continue to work with the same area of the face. Using the same edge (side 5) and a 90 degree angle, work the same area of the face but this time move the gua sha with tiny vibrating movements towards the hairline. Flatten the gua sha as much as possible the closer you get to the hairline so you'll end up with a 15 degree angle. Imagine that under the skin are multiple air bubbles which need to get out. Repeat 5-20 times. If possible, use the opposite hand to stretch the skin.
Repeat the exercise by using the long smooth edge (side 5). Place the tip of the edge right under the eye by the corner of the eye and the other end of the edge by the corner of the mouth to drain the whole eye and cheek area. Use the same movements as in step 6 and pull over the skin with feather light pressure all the way towards the hair line. Repeat 5-20 times.
Now use the Sculpt edge (side 4) Place the gua sha next to the beginning of the brow - drag it all the way towards the hairline and do a couple of wiggles. Repeat 5-20 times.
Using the pointy tip of the concave edge (side 2) of the gua sha, do acupressure on the following points:
1. inner corner of the eye.
Place the tip under the brow. Hold the point with a comfortable pressure for 30 seconds. This helps to release eye strain.
Continue to use the same side of the gua sha at the same place. The edge is placed under the brow alongside the brow all the way to the hairline. Repeat 3-5 times. Pressure is medium. Use the opposite hand to do a good stretch.
2. the center of the edge of the lower eye bone.
Place the tip (side 2) under the highest level of the brow. Hold the point with a comfortable pressure for 30 seconds. Afterwards continue with the gua sha in a straight line towards the hairline.
Flip the gua sha and use the Sculpt edge on the brow.. Use the Sculpt from the beginning of the brow towards the highest level and continue in a straight line towards the hairline and do a couple of wiggles at the hairline. Repeat minimum 3. times. Pressure is medium.
3. outer corner of the eye.
Place the tip (side 2) under the outer corner of the eye. Hold the point with a comfortable pressure for 30 seconds.
Flip the gua sha and use the Sculpt edge on the brow. Use the Sculpt from the beginning of the brow towards the end of the brow. Continue in a straight line towards the hairline and do a couple of wiggles at the hairline. Repeat minimum 3. times. Pressure is medium.
Place the textured edge (side 3) between the brows and pull it with a medium pressure up towards the hairline. End the pressure with a wiggle. Repeat 3 times minimum.
Place the textured edge (side 3) on the highest level of the brow and pull it with a medium pressure up towards the hairline. End the pressure with a wiggle. Repeat 3 times minimum.
Place the textured edge (side 3) outer corner of the brow and pull it with a medium pressure up towards the hairline. End the pressure with a wiggle. Repeat 3 times minimum.
Now turn the gua sha and use the Sculpt edge. It is time to lift the brow. You need to do the lifting in 3 lanes from under the brow to the hairline. The pressure is medium. Repeat 3 times minimum.
Using the textured edge of the gua and placing it on a 45 degree angle on the lower part of the temple, pull the gua sha with medium pressure up towards the hairline. You can go all the way on to the scalp with this technique if you like. End the pull with a couple of wiggles. Repeat 3-20 times.
Complete the facial with the classic lymphatic drainage strokes using the sculpt edge. You start at the top of your forehead, in the center, and with the warped edge as flat as possible on the skin, you pull it with feather light pressure towards the hairline. Repeat all the following lymphatic strokes 5-20 times.
Do the same on the lower part of the forward.
Repeat under the eye area and upper part of the cheek area and pull the gua sha towards the center of the ear.
Repeat under the cheekbone starting at the corner of the nose and pull the gua sha towards the lower part of the ear.
Repeat from the corner of the mouth on the lower chin towards the lower part of the ear.
Repeat from the center of the chin towards the lower part of the ear.
Now place the warped edge at the upper side of the ear and pull gently down towards the collarbone. End this pull with a couple of wiggles.
Check your face in the mirror to see the difference between the two sides of the face.
Now repeat the whole facial on the other side of the face.
PRO TIP:
Remember we always recommend to massage your neck and shoulders with the gua sha before you do a facial, as this helps to remove tension so that the lymph flows more freely.
HOW DO I CLEAN MY GUA SHA?
You should wash your Gua Sha with soap and water after each use. Crystals absorb energy so we also like to clean our Gua Sha crystal energetically with sea salt baths.
Fill a bowl with 3dl of water and 1 tbs sea salt. Place the Gua Sha in the bowl and let it be there for up to 24 hours. If you have more than one Gua Sha crystal to clean, clean them separately, not in the same salt bath.
You can also place your crystal Gua Sha tools in the window sill during full moon to charge them.
Some crystals don't tolerate water, however all crystals from our selection does.
NB the metal on our glow rollers don't tolerate salt water, so to clean them energetically you just place them on dry salt for up to 24 hours.
When not to Gua Sha
Gua Sha massage is not ideal when you have:
- Sunburn
- Fugus
- Infected skin
- Wounds
- Damaged skin
- Skin cancer
- Ilness
- Swollen lymph nodes
- Fever
NB: If you are in doubt, always ask your doctor. Be aware if you are taking medication, especially if it is blood thinning. If you have any type of blood disorders or have extra sensitive skin due to illness and medicine talk your doctor first.
Can I use my Gua Sha while pregnant?
You can do Gua Sha Facials no problem, but ask your doctor first before doing Gua Sha on your body, as doing any kind of detoxifying treatments during pregnancy is your own responsibility.
Zero Waste
At Calmlish we practise zero waste from production to post consumption, meaning we have a return system where we upcycle your broken beauty tools and we use the leftover crystals from our factory’s production. It has taken Nature millions of years to produce each crystal, so it’s important to us that nothing is wasted.
We repurpose the leftover crystals and broken beauty tools into earrings and rings in collaboration with the amazing jewelry artist Nordling, some become meditation stones and others become high vibe filling in our upcycled silk eye masks.
Our gua sha carry bags and eye mask are made in collaboration with the sustainable clothing brand Sissel Edelbo using the left over silk from the vintage silk sari clothing production.
Who is CALMLISH?
Calmlish is a holistic and honest lifestyle brand carrying stylish products
that promote a state of calm; a calm mind, calm body, calm skin.
We believe in beauty rituals that create harmony through balancing the body’s energy systems, lymphatic system, nervous system and hormone system.
Thus, creating a healthy foundation where beauty can manifest itself.
We have a strong mission to create pleasurable, peaceful moments trough
honest and stylish products you only need to buy once.